Over the years I've dabbled on and off with emulation of one sort or another, but I've always found it a bit unsatisfying, I much prefer the real thing. With this in mind I decided that I'd like to try my hand at a MAME cabinet. The first obstacle I had to overcome was my better half. I though about sounding her out about it, getting her playing some of the games and seeing how it went, but I decided that the direct approach was best so I just blurted it out one night. The reception I got was a bit lukewarm, so I thought I'd leave it for a while and try again in a few weeks. The next day I was working at home and I got a call from my wife - the local Stock & Cheques store had a cheap 17 inch LCD monitor in, and was it what I wanted? Bargain! So off I went and brought it home. With that blessing I was able to formulate some kind of a plan for what I wanted. A full upright cabinet was way too much to go for, we simply don't have space, but a cocktail style one could replace the table in the games room.
Initial Construction
The first thing to do was decide how big I wanted the cabinet to be. I knew where it needed to fit within the games room, so that gave me the maximum width, the depth came from the height of the monitor plus a bit to make the proportions of the top look decent. The basic cutting and screwing took me about 4 hours. It's built from 12mm MDF in a bid to keep costs and weight down. |
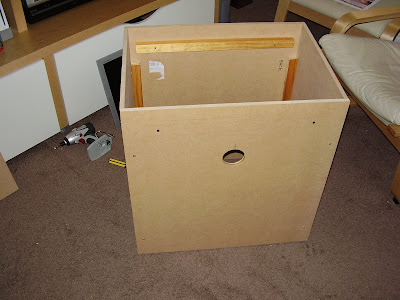 | Monitor Mount
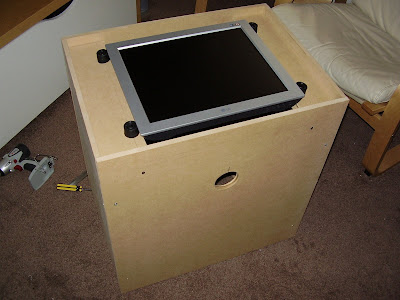
The plan was to have the top rest on the sides of the cabinet, so it could be simply lifted off for access to the monitor and other electronics within the cabinet. I built a frame to hold the monitor which could be slid around on the X & Y axes to allow me to position the monitor correctly within its window. |
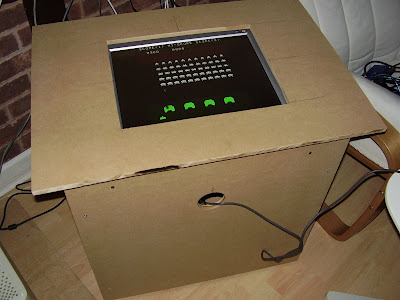
 | Games - in action!
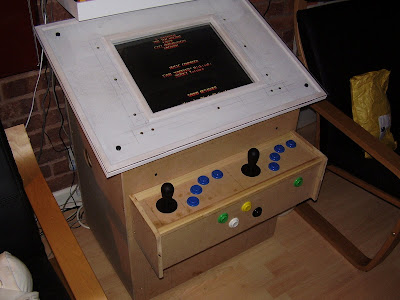
With all the basic connected up it was time for a first test. All worked well, although the lack of a proper control panel was quite a disappointment. This is it playing Space Invaders, which seemed fitting for a first game. |
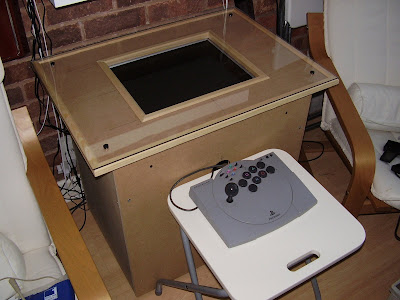
 | Top Cover
At this point I added a nice trim to the inner and outer edges of the top, and fitted a plastic top. The lack of the latter was beginning to worry me as it left the monitor face up and exposed. |
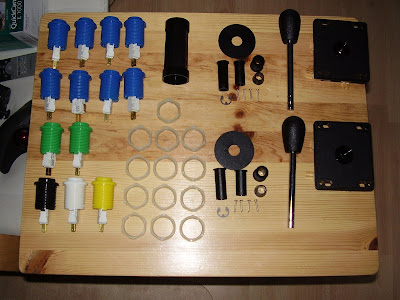
 | Parts
I ordered all the control parts from the nice people at Gremlin Solutions. They had an eBay shop, and good photos and descriptions of all the things I needed, which made the whole ordering a breeze. I'd love to order some of their arcade cabs too, they look soooo nice, alas the money they want is out of my league. And I'd have to explain to the wife where we're going to put them, because just one would look stupid wouldn't it? |
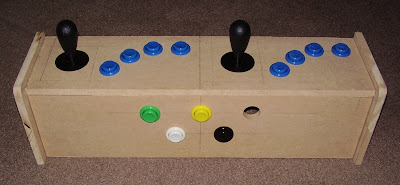
 | Control Panel
The width of the cabinet determined the size of the control panel I'd be able to have. I didn't want controls at each end because it's much more fun actually being side by side with your opponent. The basic framework and installation of the buttons was pretty straightforward; unfortunately I made a mistake with the P2 Start button and I couldn't fit it where I'd originally planned as it's blocked by the P2 joystick, so I needed to cut a new front section and re-drill it. That problem aside the controls looked and felt great. |
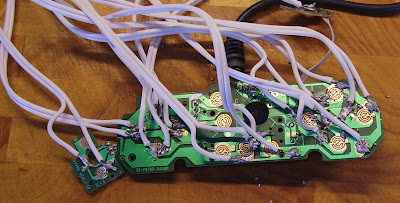
 | Control Electronics
I'd got no end of PSX-USB adaptors kicking around, and with the extreme cheapness of third party PS1 controllers I thought they'd be ideal to use as the basis for each of the controller boards that I needed to build. The first thing that I had to do was lightly remove some of the protective cover from each of the PCBs, which was easily done with a small file. Each of the buttons would require 2 wires, so these were soldered directly to the exposed copper. |
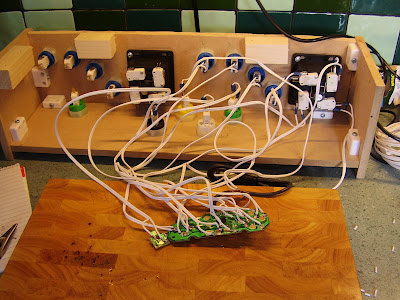
 | Wiring
The other end I crimped spade connector fittings to, which makes for a good fit to the controls without being permanent. It also allows me to unclip everything from the controls later, to make painting an easier task. |
 | Assembly
At this point I decided to make some modifications to the top. I wasn't happy about the viewable angle of the LCD screen I was using, so I fitted some mounting brackets to the underside of the top, added hinges and props, and now the whole thing is angled so that it's much easier to see what's on screen. Lowering the props allows me to level the top and use it as a table again when I'm not playing games on it |
 | Paint
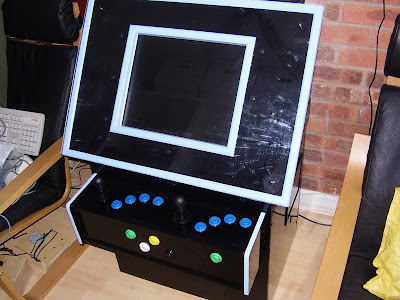
I'd decided some months ago about the colour scheme I was going to use, and I'd settled on gloss black with pale blue trim. It needed to be easy on the eye, and as the games room isn't huge, not too garish. It took 3 coats of the black to get it to the level of finish that I wanted, but the end result was certainly worth it. The picture here shows it with the top folded flat. |
 | Ready to Play
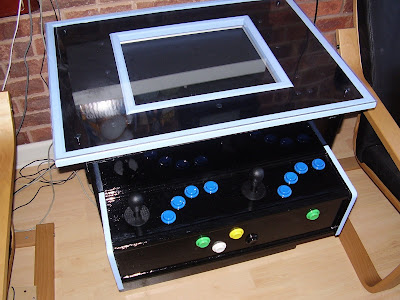
And here it is with the top in position and ready to go. |
 |
To get to this stage took me a little under 10 months, which is way too long, and I could have cut the time down tremendously if I'd not lost motivation part way through the project. It took a pending visit from one of my friends to actually get me to get my ass in gear, and since then I've cracked on a-pace.
I've still got more to do; I want to build some add-on controls for games that don't support a joystick directly, such as Temptest which needs a spinner, and Marble Madness which uses a trackball. Both of these have arcade parts that are readily available, but they're very expensive, so I've built prototypes from mice and pc trackballs that I've got in the spares bin. Next up is to get them into matching boxes and add paint.
|